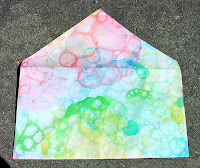
When I was a kid, in the 70's, I was surrounded by...strange things. All of us Gen X'er's were. (Don't believe me? Watch some H.R. Pufnstuf, or the Banana Splits for awhile.) The world was weird and wonderful, for us kids. Technicolor bright, and utterly nonsensical. Grownups, in particular, didn't make sense, but they seemed pretty happy about it, most of the time. And how could they not be? Everything was so colorful! Kinda like this:
 |
| Bubble-dyed envelope |
In the 70's, fantasy and sci-fi stuff was HUGE, from books to movies, and from home decor to clothing. To get in the mood for this project, you might want to watch Fantastic Planet. (Netflix has it on DVD now- totally worth 73 minutes of your time!)
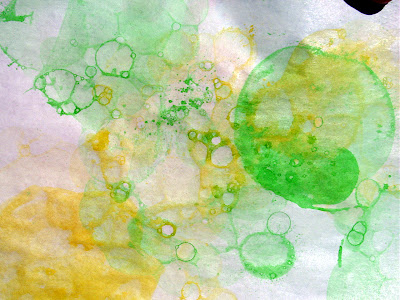
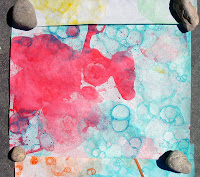
This project reminds me of that. Aren't these cool?
 |
| Trippy bubble dip-dye |
This is a cheap, easy, messy project, and the results are amazing! It's a lot of fun for kids- how many times have you told them not to blow bubbles in a beverage with a straw? Now they can (but don't let them drink it. Ingesting dish soap gives the term "the scours" a whole new meaning.) Plus, the finished writing paper will go through a printer with no problem- even your grocery list can have that groovy 70's vibe.
This is how we do it!
Hit up the dollar store and grab:
A plastic table cloth (or do it on a glass patio table)- there will be spills!
Small dishes that either will not stain, or that you don't care if they do
Drinking straws
Food coloring
Dish detergent (the kind used for hand-washing)
Water
Printer or typing paper
Envelopes (if you want matching sets for mailing)
A surface to dry your works of art on, or you can also use a clothes line for fast drying)
 |
| Dollar $tore supplies |
 |
| H.R. Cups n' Stuf |
Put some water in your cups, and add a nice blop of dish soap.
A large drop or two is all it takes- you're looking to make a thin,
bubble-up-able medium for your dye.
Add food coloring- a LOT of food coloring, especially for your yellow and orange colors. We started out with about a quarter of a bottle for each dish, but wound up using about half a bottle for each, by the time we finished. The stronger your coloring, the less layering you'll have to do later.
Stir it up and blow some bubbles!
 |
| Thing Two- Mr. Bubble Machine! |
 |
| Thing One follows suit |
 |
| Bubbles! |
Grab an envelope, and start makin' with the bubbly fun!
Your best bet (unless you're using the expensive envelopes with the non-lick adhesive) is to wear it on your hand like a puppet, keeping the sticky bit held out- you don't want to pre-seal 'em!
 |
| Gotta keep 'em separated.... |
For lighter color saturation, blow bubbles and dip your paper across the tops of your bubble formations. As the bubbles pop, they'll color your paper in all sorts of interesting ways.
For darker sections, blow bubbles while passing your paper over the bubble mass- stronger, fresher bubbles will leave darker coloring on the paper.
To get the really dark outlines, blow enough bubbles so that some stick to the paper, instead of popping right off the bat. Don't pop them- let them sit until they pop on their own, and they'll reward you with richly colored outlines!

The beauty of this project is, there's really no right or wrong way to do it. Some of the papers curled up, but after they'd dried (in a matter of minutes!), stacking and pressing them with a book worked wonders...a dry iron on low would probably have the same effect.


One thing that helps a lot: color the fronts of your envelopes first, and let them dry, back-side down. When they're fully dry, color the back sides!
Here's some more of our "work":


This project is definitely kid-approved!
Thing One and Thing Two really enjoyed making a Mom-approved mess.
Cleanup's a breeze- just scoop up the tablecloth when you're done. Make sure that the liquid doesn't drip on your flooring- it can (and probably will) stain!
Cleanup's a breeze- just scoop up the tablecloth when you're done. Make sure that the liquid doesn't drip on your flooring- it can (and probably will) stain!
Thing One is thrilled to have fun n' funky new stationery to use for his summer pen pals!
Write a letter to your favorite Gen X'er or Boomer on your new stationery,
and see if it brings back any memories. (Or acid flashbacks.)
I've been seeing dip-dyeing all over the internet, but it seems that bubble-dyeing has been forgotten- wonder if this would work on fabric...? If anyone succeeds at it, please, let me know! This would look GREAT on a t-shirt!
Hope everyone had a lovely weekend- we sure did!
~
Linked to Craft-O-Maniac Monday!


i would try to make these but unfortunately i do not know where to find two shirtless children to blow the bubbles for me. another dream to throw away i guess
ReplyDeleteAw, it's fun to do it yourself, too- but if you want to borrow 'em, they'd be happy to do it! :)
DeleteHa ha ha ha. Funny comment, anon. These envalopes are cool.
ReplyDeleteAgreed! LOL Thanks for the kind comment, yourownself! :)
Delete