These came in really handy, for the sale last week! Thought you all might like to know how to make 'em- they're my favorite kind of project: upcycled, fast, and effective. Plus, you get to upcycle THREE things, when you make 'em- pretty cool, eh?
So, take a guess...what do you get when you have two of these jokers?
That's right. Lots of humor. And, lots of broken stuff.
Like my picture frames, for example.
They were really nice, for a Dollar $tore score.
Good thing they're cheap, because I gotta buy 'em in multiples.
(I learned my lesson early, with Thing One and Thing Two.)
One perfect shot with a soccer ball = broken glass, and an orphan frame.
Multiply this by...many.
That's life at Casa Rodman, I'm afraid.
I don't lack for orphaned frames. Do you?
(Let me lend you a couple of kids. You won't lack for upcycling fodder for long.)
So, anyway, kidless or not, you're going to need three main things to make these, plus an adhesive of some sort (I used duct tape). The three main parts of this are:
- Item one: a picture frame, sans glass. You can either let your kids play ball in the house, or go to the dollar store and grab one, then use the glass for something else.
- Item two is probably already laying around your house- basic corrugated cardboard. I used parts of old U-Haul boxes, which had, printed on them, a message saying to "recycle this box".
Why, yes, but of course we will!
Why, yes, but of course we will!
Lay the backing of your picture frame on a piece of the cardboard, trace it, and cut it out. Feel free to dip in from the lines a little bit, to ensure that it will fit in your frame, and leave room for your fabric, when you reinstall the backing.
- Item three: fabric, preferably cotton jersey. Why jersey? Well, if you make t-shirt yarn, then you know that you wind up with something like this
after cutting up the bottom of the shirt, into strips.
(And if you make a rug, you'll have a lot of 'em. I have an entire TRASH BAG full!)
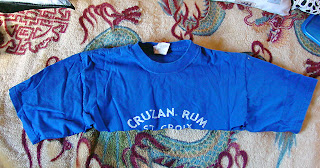
Flip the shirt-top over, and use the back, where there's no printing, and the fabric is wider.
Check to see whether your backing and/or cardboard can be accomodated.
Can it? Great!
Grab your adhesive, and some scissors, and...
...fit the t-shirt fabric around your cardboard piece, trim the shirt around the cardboard, and tack it down, as smoothly as you can. Try to keep the bulk to a minimum, especially at the corners.
I'm finding that it works best if you stretch the fabric a bit, around the cardboard, so you get a smooth surface for your display. Slightly tight fabric is also less bulky, at the back.
You can tack it down with duct tape, hot glue, or whatever you feel like- just so's it holds well.
It doesn't have to be tidy-looking- just secure. Besides, no one will see it.
(Unless you blog about it.)
Now, just ease the cardboard/t-shirt combo into the frame, and place the frame backing in there, too.
Viola! The messy bits disappear!
Push the little tab-thingies into place on the back...
And display to your heart's content!
Easy, effective, and practically free- who could ask for more?
And they look good, especially for the price.
They fit in nicely with their more expensive friends, don't they?
I'm not going to promise that these will last a lifetime- the cardboard will probably wear out pretty fast, if you poke it with a lot of pins. Mine survived their first sale, and I suspect that they'll work fine for quite awhile. The nice thing is, a new cardboard piece, and some more duct tape, and it'll be as good as new!
Happy Sunday, everybody!
~
Linking up with Craft-O-Manic Monday, one of the GREAT things about the start of the week! Also, check out the Awesome Things Blog Hop, on Tuesdays. See ya there!
Linking up with Craft-O-Manic Monday, one of the GREAT things about the start of the week! Also, check out the Awesome Things Blog Hop, on Tuesdays. See ya there!


Nice solution!
ReplyDelete