
Got some new pretties to make! And this time, we're going to make the earring findings for them, too.

You might remember that the last time we hammered out some earrings, we were left with an extra pair of these:

Today, we're going to use them. To review how they came into being, go here. To make the whole kit and caboodle, you're going to need:
Wire:
4- 3" pieces 18 gauge silver or silver-colored wire, for both hoops and swirls
2- 2 1/4" pieces 18 or 20 gauge silver or silver-colored wire, for earring findings
28 gauge copper wire, as needed (use directly off the spool)- approximately 12 inches or less
And these tools:
Nylon jawed pliers (for straightening wire, and adjusting your design without marring)
Chain nosed pliers
Round nose pliers
Bent nosed pliers (optional, but mighty useful for tucking in fine wire ends)
Flush cutters or wire cutters
Fat highlighter marker or wide marker
Bench block or anvil
Chasing or other smooth-faced hammer
Needle files or a cup burr, to finish the ends of your earwires
First, you'll need to whip up some hoops. To make the hoop frames, see the instructions here. For these earrings, you can hammer the hoops either with a ball peen hammer, for a dappled effect, or go with the smoother approach. I took the smoother road this time, but it's up to you!
Next, we're going to make the swirls. Take one of your remaining 3" pieces of 18 gauge wire, and start a swirl-


Grab the very end with your chain-nose pliers, and crook it over HARD. Make a nice, tight little curl to start with, and then grab it with the side of your pliers, and start the scroll...


Shift your wire in your pliers frequently- this will give you a nice, even scroll. You're basically just rolling it up!
When you have about 1 3/4" of straight wire left, it's time to switch sides...

Start another scroll, opposing the first, but more roll it more loosely. One scroll should be about 3/8" across, and the other should be about 1/4". The entire swirly piece should be around 3/4", total length.


Make a second scroll to match the first, and hammer them both lightly. Check your layout on your hoops, and adjust the swirls as needed to fit. Try out different angles, too!

Bind your hoops closed with the copper wire, tucking in any snaggy ends, first with the nylon-jawed pliers, and then with the bent-nose pliers.
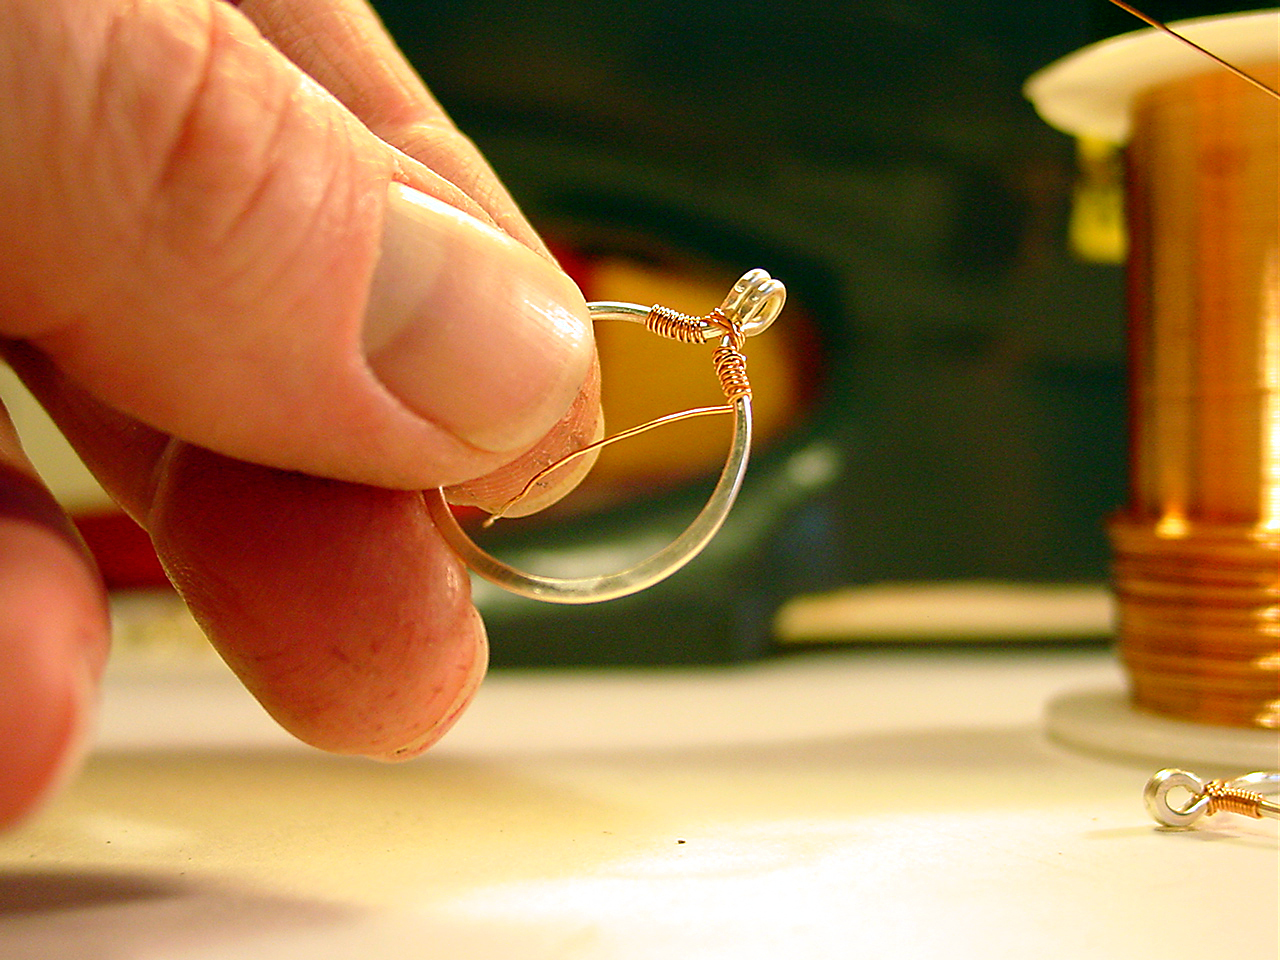


Next, start attaching one of your swirls:

Hold your swirl *just* overlapping the hoop, to the side of the hoop that you've chosen for the front of your piece- this ensures a tighter "grip" and stability for the hoop overall, and adds depth and dimension to the dangle.


Tidy up your wire ends, tuck them down, and check the layout for your second dangle.
Wire it up, too.
Et viola! We have dangles! You're more than halfway there!

One of the beautiful things about working with hoops is that you can move things, even once they're wrapped on and attached. Check your alignments, and adjust as necessary.
Scoot stuff around, if needed.
How're they looking?

Yep. That'll do.
Now let's make some of those fancy ear wires! Grab your round-nose pliers, the highlighter or marker, and those last two pieces of silver wire...
Start by making a simple loop on one end of one of the 2 1/4" pieces of wire:

No need to center it- just roll it up!
Next, shape it around the barrel of your marker, much as you did with the hoops.

If you wonk it up (like I did!), adjust the looped end, so that it's straight, and then grab your hammer. Gently hammer the entire piece, to harden it. If you like, hammer some parts to widen the wire, but avoid doing so at any spot that will be going through an ear piercing- thinly hammered wire can give you a bit of a cut, and no one likes an irritated ear!

Adjust the wires, if they get out of round, and tighten up the hanging loop (because inevitably, the hammering action will open it up a bit!) Wrap some pretty copper around the shaft of the earwire, near the loop. As before, tuck the ends close to the main wire, so they won't snag anything.

Using your needle files or cup burr, finish the business ends of the earwires by rounding them down- double check 'em, too, because a sharp point or raw cut end can hurt like the dickens!
And you have this:

The final step is to attach your earwires to your dangles. There's no picture for this, but hey, it's pretty easy- you can either attach them using a jump ring, or gently open the loops on your earwires, and hook 'em up that way- it all depends on how you want them to hang.
And you. Are. DONE!

Pretty cool, eh?
The earrings from this tutorial will be available as a one-time offering on our Indigogo fundraising site, Uniting a Family. We're trying to raise funds so that The Big Guy can meet his birth family- read more about how we found them here and here!
Now, you may have noticed that my fingers looked kinda, well, grungy throughout this tutorial. They weren't actually dirty. No, really. Trust me, I'm a former cook- I wash my hands almost more frequently than I breathe! (Ask the Big Guy- I go around gasping all the time. It's awful! No, just kidding. I remember to breathe. Mostly.) But anyway- they look kinda stained, yes?
How they got that way is really, really cool. You won't want to miss it- there's another tutorial, coming your way soon! And it's...transformational.
(Yes, I did say that in my "mysterious" voice!)
~
Linking up to Craft-O-Maniac Monday and Make It Wear It Thursday at the Train to Crazy!
Just saw these and the first ones you made like these. This is the kind of project I was looking for to expand my skills. I been doing hammered swirl headpins and wrapping beads. Now all I need to do is run out and buy some 28 gauge wire and a couple of textured hammers. They are gorgeous! Thanks. B.E.
ReplyDeleteThanks! I'm glad that you're enjoying the tutes- it's been fun making them. You can also use 24 gauge for a different look- it's a little sturdier, too.
DeleteI took your idea and adapted it. I used gold-tone wire to make the swirl and attached it to a pair of silver-tone hoops. They came out great. Thanks for the idea!
ReplyDeleteCool! That's gotta be really pretty! :D
Delete